Skip to main contentPersonas in Vello add another layer of customization and functionality to your AI experience. They can be simple roles or developed into complex assistants empowered with specific abilities.
Creating a New Persona
Creating a persona is a straightforward process within Vello:
-
Launch Persona Creation: Open the space settings and navigate to the ‘Members’ section. Here you’ll find personas. Click the
+ icon to start creating a new persona. Alternatively, use the keyboard shortcut Ctrl+Shift+M.
-
Persona Details:
- Name & Photo: Assign a unique name and upload an appropriate photo for your AI Persona.
- Base Model: Select a base AI model, such as GPT-4, best suited for complex tasks that require deep reasoning and creativity.
-
Define the Persona’s Instructions: Provide a role description and detailed identity for your AI persona. The more specific you are, the more tailored the AI behavior will be. Whether you need an assistant, a coding companion, or a creative thinker, you define the persona’s abilities.
-
Abilities and Skills: Choose to enable various abilities such as coding, web search, image generation, and knowledge usage. These will define what your persona can do within chats.
-
Coding: Grant your persona the capability to write code, analyze data, and interact with data files, turning it into a powerful ally for software development and data science tasks.
-
Web Search: Allow your persona to tap into the web, searching for answers and incorporating the latest information into its responses, perfect for research and fact-checking.
-
Image Generation: Enable your persona to create visual content on-demand which can be a vital asset for design, branding, or simply bringing ideas to life visually.
-
Knowledge: Turn your persona into a knowledge powerhouse that can access and apply insights from files you upload, making it a subject matter expert that’s tailored to your needs.
-
Assistant Team: By selecting this option, your persona can act as a coordinator among multiple models and personas. It can delegate tasks, ensuring that requests are handled by the most suitable model or persona within the team.
-
Training with Data: If your persona requires specialization, you can train it by uploading relevant files. This way, your assistant can draw upon this data to provide informed and context-aware responses.
-
Finalize and Integrate: Once you’ve set up your persona’s characteristics and skills, add it to your team. Integrated into your chats, your persona can now assist with tasks, engage in conversations, or collaborate with other personas.
Assistant Team
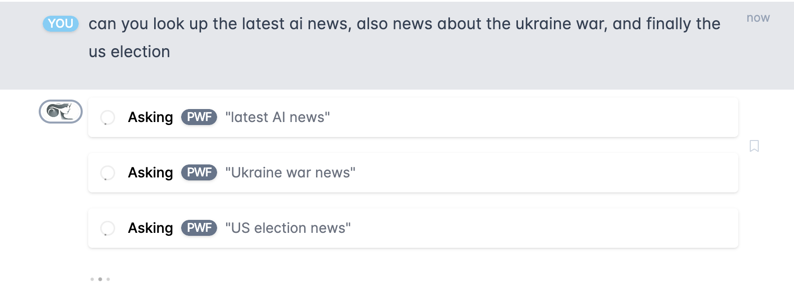
 The “Assistant Team” allows your persona to collaborate with an array of other models or personas by routing requests to them. It’s especially useful when you want to leverage the collective strengths of multiple AI entities.
Utilizing Personas in Chats
After your persona is created, you can mention it in chat rooms just like any other model. Leveraging personas customizes your interaction with AI and enhances productivity and creativity within your team.
To modify an existing persona after it has been created:
-
Edit via Settings: Navigate to your space settings and under the ‘Members’ section, click on the row corresponding to the persona you wish to edit.
-
Direct Chat Edit: Within any chat, click on the persona’s user pill to access and edit the persona’s settings directly.
 The “Assistant Team” allows your persona to collaborate with an array of other models or personas by routing requests to them. It’s especially useful when you want to leverage the collective strengths of multiple AI entities.

